


Vendor Access User Guide
Overview
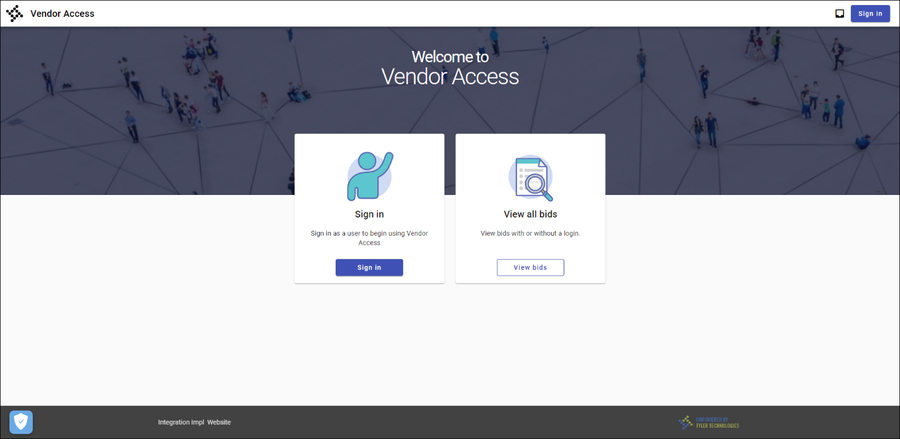
Vendor Access provides vendors with cloud-based access to information stored in Lake County’s Tyler ERP solution. The information may be drawn from various ERP modules, such as accounts payable, purchasing, contracts, bids, and enterprise assets.
Using Vendor Access, vendors can enter and maintain their contact and remittance information, discount and payment terms, required documentation, and the commodity codes that represent the goods and services the vendor can provide.
A listing of the vendor’s current and prior 1099 data, bids, purchase orders, invoices, contracts, checks, and work orders is available in Vendor Access. Lake County staff typically enter this information using the ERP solution, and it becomes available to vendors for inquiry purposes. With Vendor Access, vendors can also submit invoices and bid proposals directly.
Vendor Access allows vendors to search and view bid information and then submit a bid proposal or quote. The submission process creates bid records in the ERP database that can be reviewed by Lake County’s bid management personnel.
↑ Back to top
User Accounts
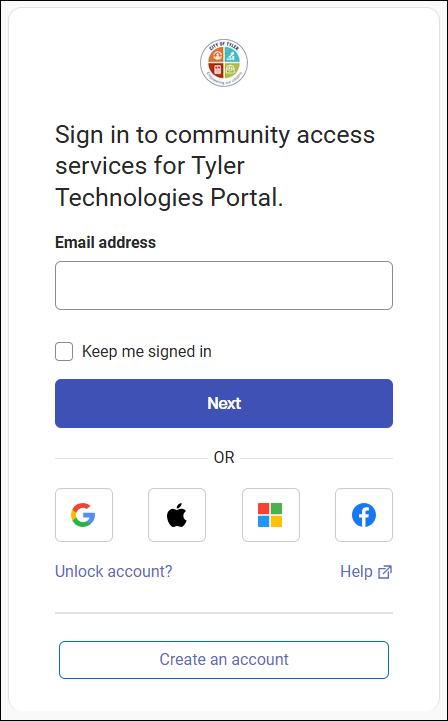
Vendors who access Lake County’s Vendor Access application must create a Tyler Identity log-in account. The log-in account requires an active email address and a password.
When accessing Vendor Access, the application presents the Community Access sign-in screen with options to associate an existing log-in from Google®, Apple®, Microsoft®, or Facebook® with the Tyler Identity account. Alternatively, users can create a new account using the Create an Account option at the bottom of the screen.
The Help link on the sign-in screen provides detailed steps for password management, including setting up multi-factor authentication.
↑ Back to top
New Users
First-time users click the Create an Account (or Sign Up) link at the bottom of the sign-in screen to open the account creation dialog.
Enter a valid email address, create a password, provide your first and last name, then click Sign Up to create your Tyler Identity account. The application sends a confirmation email to the address you provided.
After receiving the email and clicking the Verify Email link, the User Profile page is displayed. From this page you can complete your profile information, connect accounts, configure payment methods, and set your notification preferences.
↑ Back to top
Existing Users
If you already have a Tyler Identity account, enter your registered email address and password on the sign-in screen, then click Sign In to access the home page.
You may also choose to sign in using a connected Google®, Apple®, Microsoft®, or Facebook® account if you previously associated one with your Tyler Identity profile.
↑ Back to top
Password Resets
If you have forgotten your password, click the Forgot Password? link on the sign-in screen. The application walks you through the steps to reset your password.
The Help link on the sign-in screen also provides detailed password retrieval instructions, including guidance on multi-factor authentication setup.
↑ Back to top
Locked Accounts
If your account becomes locked (typically after multiple failed sign-in attempts), click the Unlock Account? link on the sign-in screen. The application provides the steps needed to unlock your access.
If you continue to have trouble accessing your account after following the unlock procedure, contact Lake County’s vendor support for assistance.
↑ Back to top
The Welcome Screen
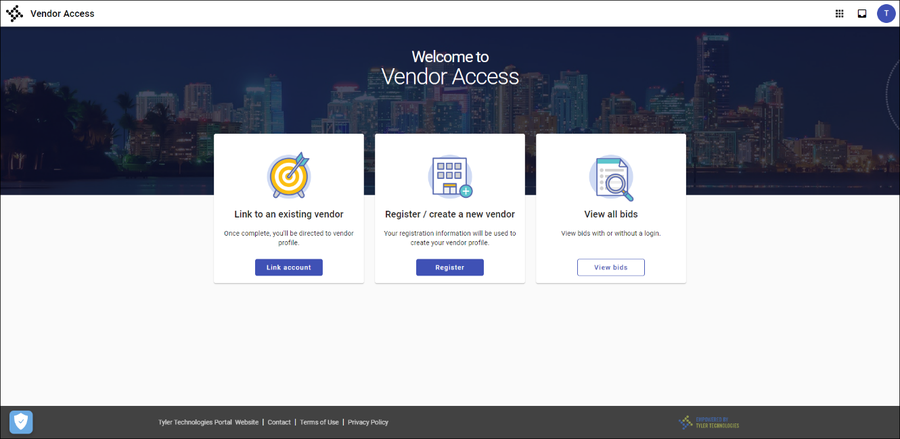
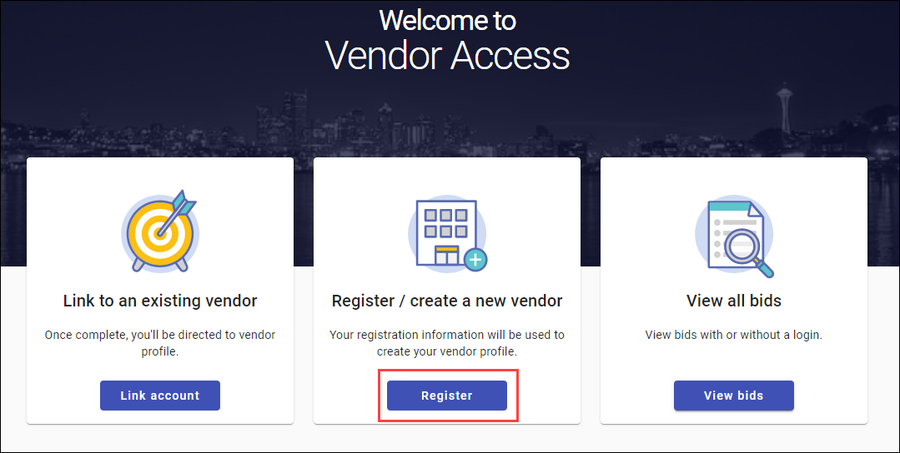
When you log in to Vendor Access for the first time, the Welcome to Vendor Access screen provides options to establish a link to an existing vendor record, register or create a new vendor record, or view all bids. Once a vendor profile is established, this screen is bypassed and users go directly to the home page.
The options available on this screen are as follows:
- Link to an existing vendor — Associates the currently logged-in user with an existing vendor account established in the integrated Tyler product. The vendor number and the federal identifier (FID), such as a Social Security number or Taxpayer Identification Number, are required to verify the account.
- Register/create a new vendor — Creates a new vendor profile. Used when the vendor does not have an existing vendor account in the integrated Tyler product. Depending on configuration, Lake County may need to approve the vendor’s account information before the vendor can submit invoices.
This screen also includes the following buttons in the banner, found on all Vendor Access screens:
- App Launcher — Provides access to other Tyler products if Lake County uses multiple.
- Resources — Links and documents Lake County has added for vendors.
- User Information / Sign In — Displays the currently logged-in user’s name and email, plus a sign-out option.
↑ Back to top
Linking to an Existing Vendor
If you already have a vendor record in Lake County’s Tyler ERP solution, use the Link Account option to connect your Tyler Identity login to that record.
Click Link Account to associate the currently logged-in user with an existing vendor record.
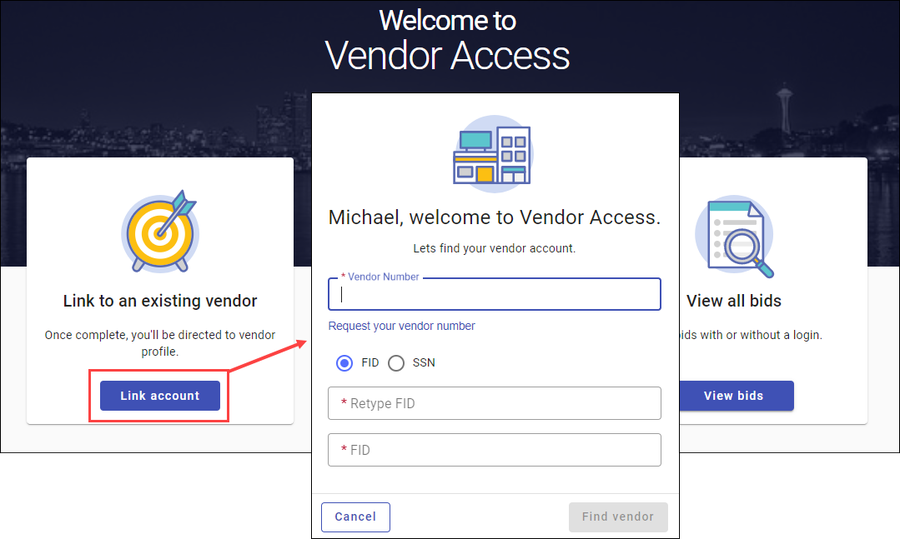
Enter the vendor number and the vendor’s federal identifier (FID) or Social Security number (SSN). Use the Request Your Vendor Number link if you do not know your vendor number.
Click Find Vendor. The application retrieves the vendor information from the Tyler ERP system.
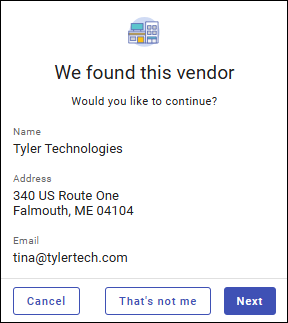
If this is the correct vendor, click Next. If not, click That’s Not Me to re-enter the vendor information.
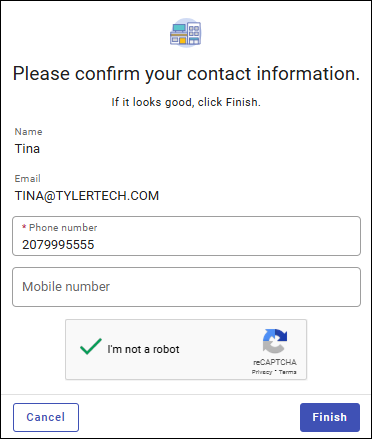
Enter at least one phone number, complete the reCAPTCHA requirements, and click Finish.
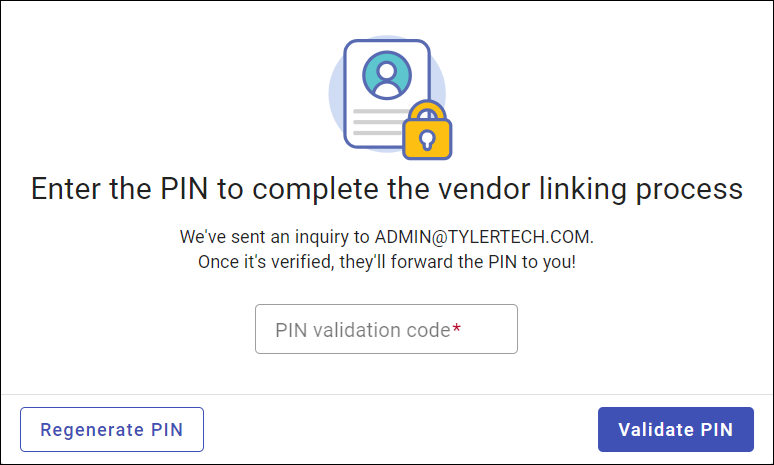
You will be prompted to enter a PIN validation code. You cannot access any vendor information until the PIN is validated.
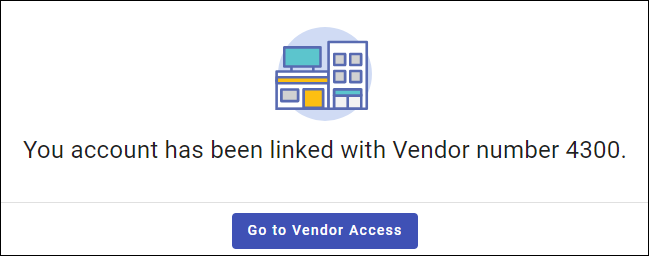
Enter the PIN and click Validate PIN. Vendor Access links the user to the vendor account.
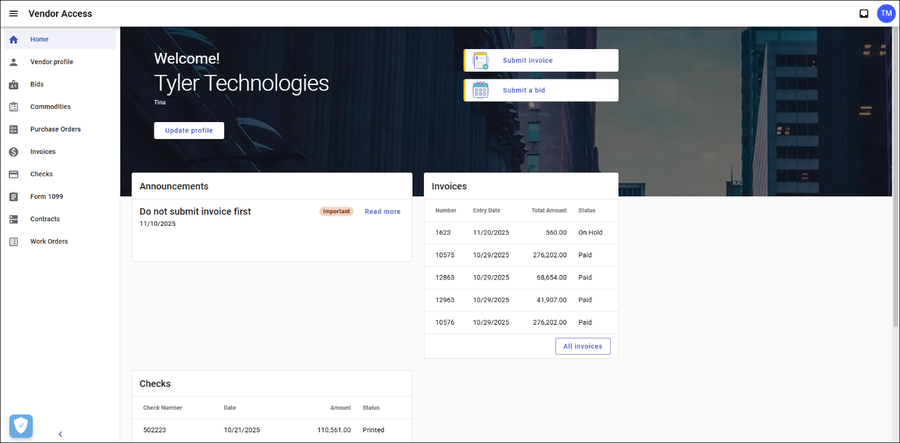
Click Go to Vendor Access to open the home page. All invoices, purchase orders, and other data associated with the vendor are now linked and searchable.
↑ Back to top
Registering / Creating a New Vendor
Use this option if you do not have an existing vendor account with Lake County. Fields and options may vary depending on your organization’s settings.
On the Welcome screen, click Register. Step 1 prompts for the business name and federal identification number (FID) or Social Security number (SSN). All fields marked with a red asterisk (*) are required.
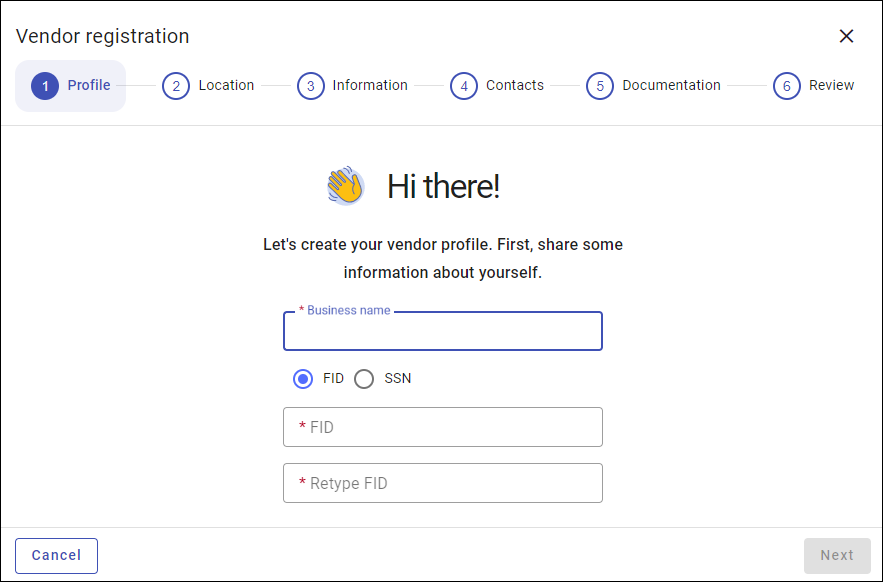
Complete the fields and click Next to proceed to Step 2 — Location Details.
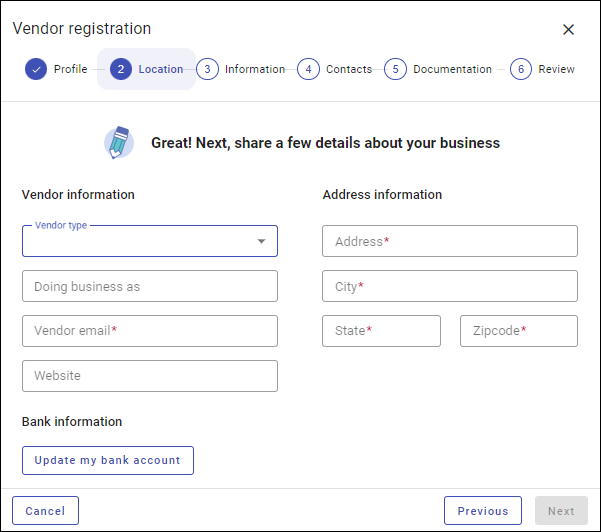
| Field | Description |
|---|---|
| Vendor Information | |
| Vendor Type | The type of vendor (e.g., payroll vendor, employee, equipment vendor). |
| Doing Business As | The vendor’s DBA name, if applicable. |
| Vendor Email | The vendor’s email address. |
| Website | The vendor’s website address. |
| Address Information | |
| Address / City / State / ZIP | The vendor’s mailing address. |
| Bank Information | |
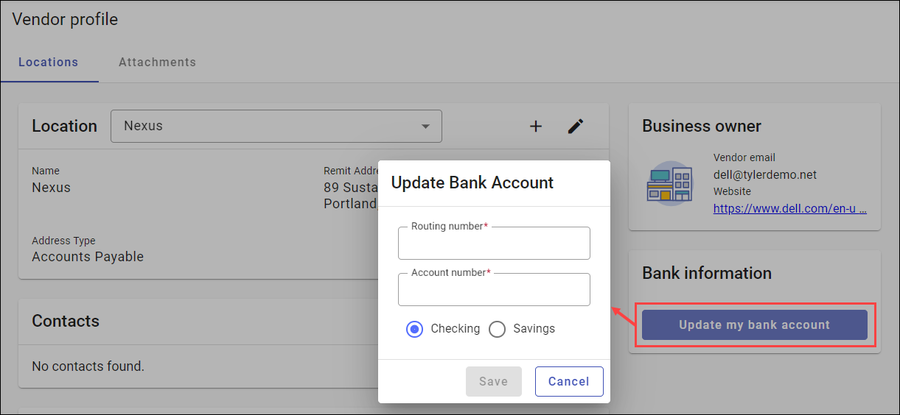
| Update My Bank Account | Click to add vendor banking information. The bank code and account must exist in the ERP system; Vendor Access will verify it matches. |
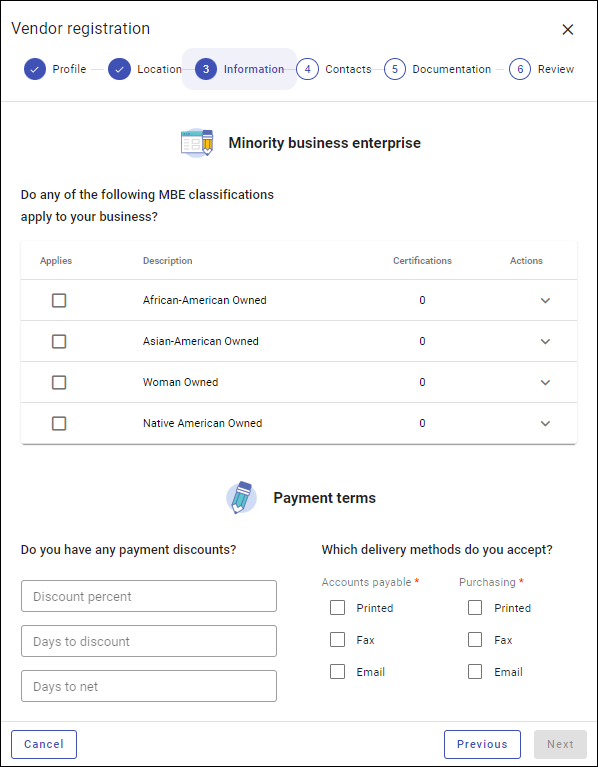
Click Next to proceed to Step 3 — MBE Classifications and Payment Terms. If payment terms are unknown, click Next to skip to Step 4.
| Field | Description |
|---|---|
| Minority Business Enterprise (MBE) | |
| MBE Classifications | Select any applicable MBE classifications. An Add (+) option allows you to attach a certificate with Agency, Issue Date, Expiration Date, and Notes. |
| Payment Terms | |
| Purchasing — Delivery Methods | Select accepted delivery methods for purchasing: Printed, Fax, or Email. |
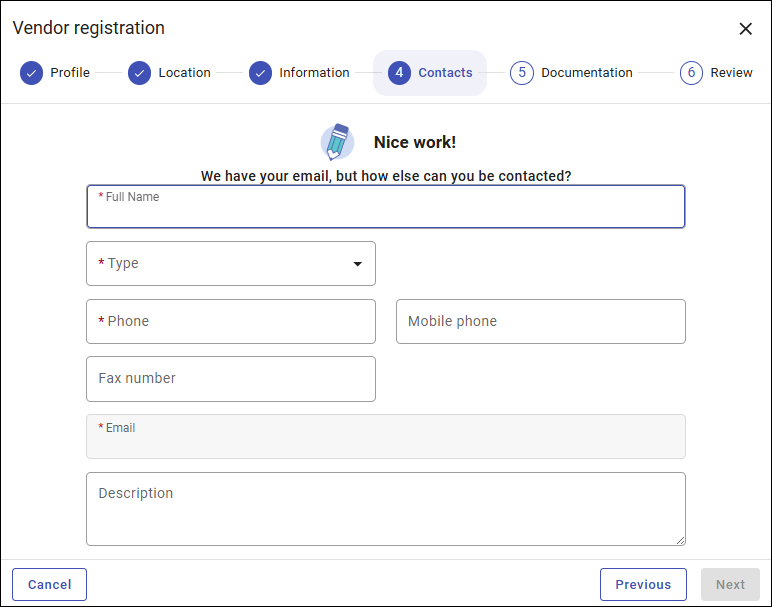
Click Next to proceed to Step 4 — Contacts.
| Field | Description |
|---|---|
| Full Name | Auto-populated based on the email address used to log in. |
| Type | Contact type: General Contacts or Purchasing Contacts. |
| Phone | Required phone number for the contact. |
| Mobile Phone | Optional mobile number if different from the primary phone. |
| Auto-populated based on the login email address. | |
| Description | Optional comments, such as job role or preferred contact method. |
Click Next to proceed to Step 5 — Documents. Use the Upload option to attach required files. Required documents must be attached before continuing; optional documents can be supplied later.
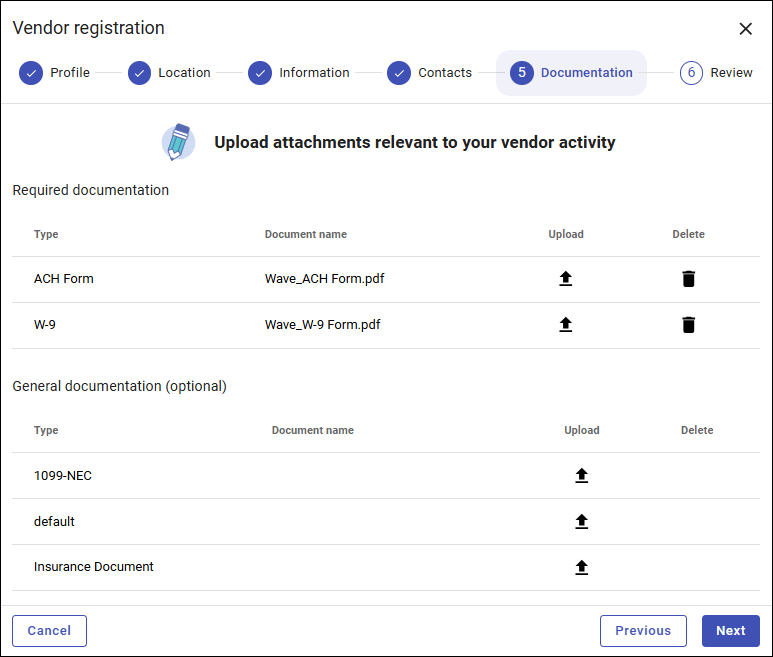
Click Next to proceed to the final review step.
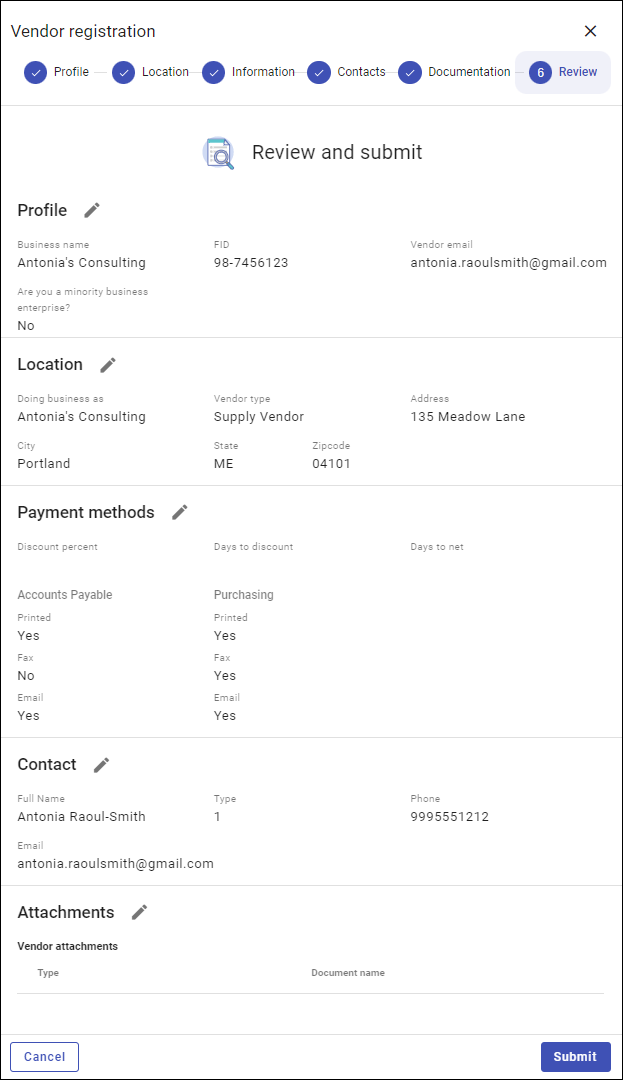
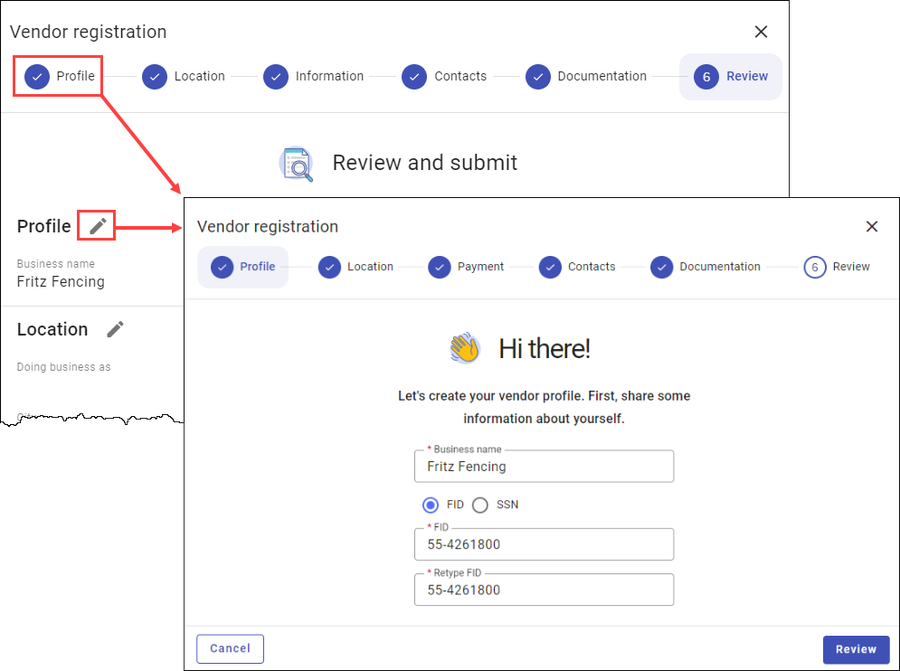
Review all entered information and click Submit. To make changes, click the applicable step number or the Edit option beside the step heading.
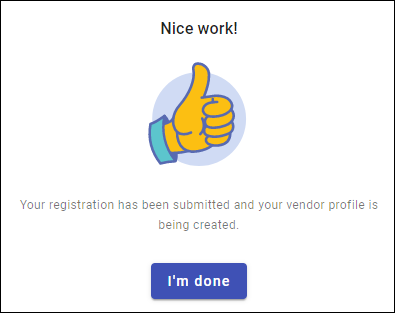
After submission, a confirmation message is displayed. Click I’m Done to continue to the Vendor Access home page.
↑ Back to top
Home Page
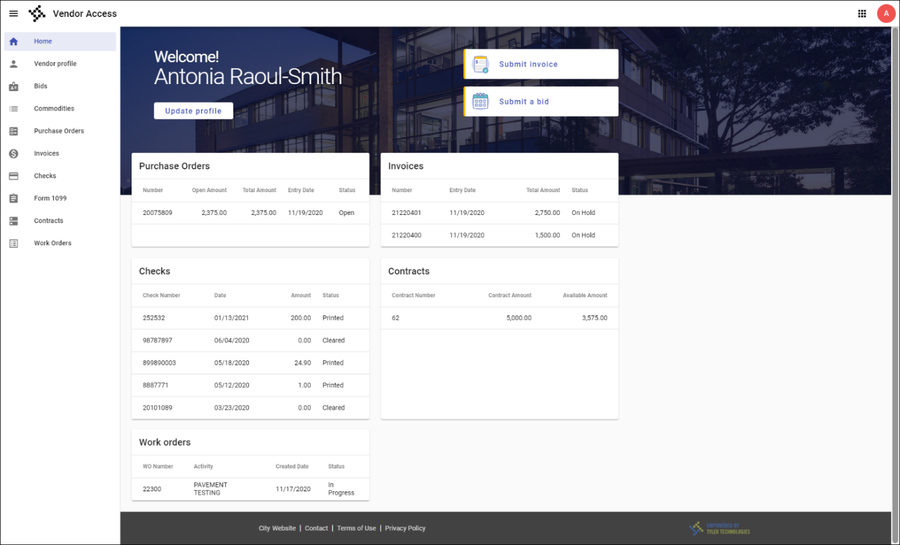
Once a vendor profile is established, the Vendor Access home page is the primary landing page when users log in. It displays the vendor’s profile information and provides access to Purchase Orders, Invoices, Checks, and 1099 Forms.
The home page also displays any announcements posted by Lake County, if applicable.
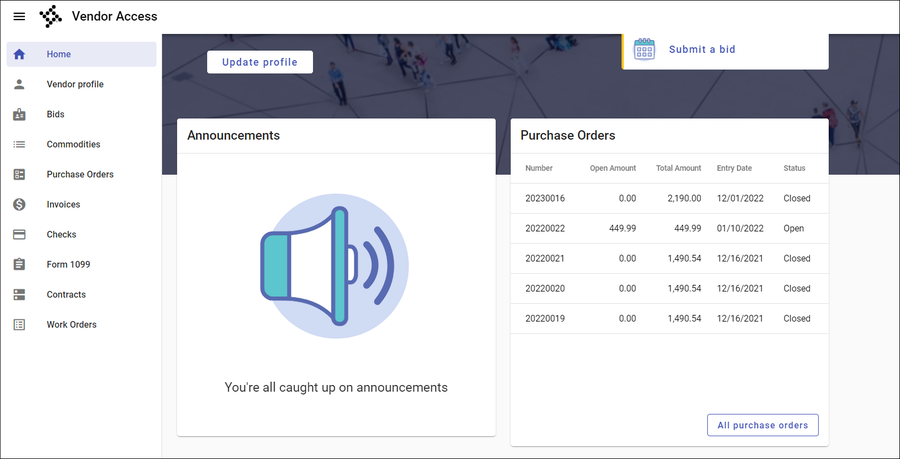
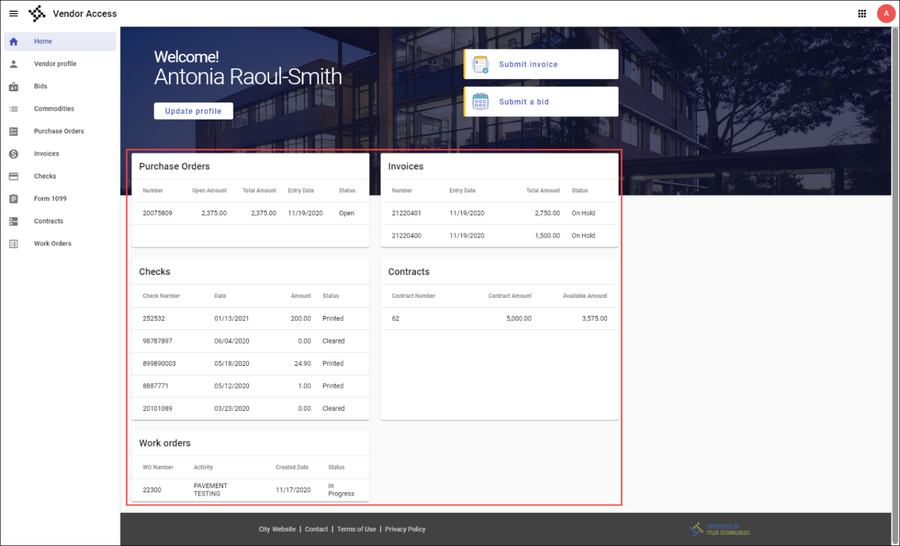
The bottom of the home page shows overview information about records associated with the vendor (informational only). To access the records themselves, use the navigation menu.
↑ Back to top
Using the Navigation Menu
The bottom of the home page provides overview information about records associated with the vendor. These are informational only — to access the records themselves and perform tasks, use the navigation menu.
Clicking the Menu button at the top of the page hides or displays the navigation menu. From the navigation menu, users can access all Vendor Access functions including Vendor Profile, Purchase Orders, Invoices, Checks, and Form 1099.
↑ Back to top
Vendor Profile
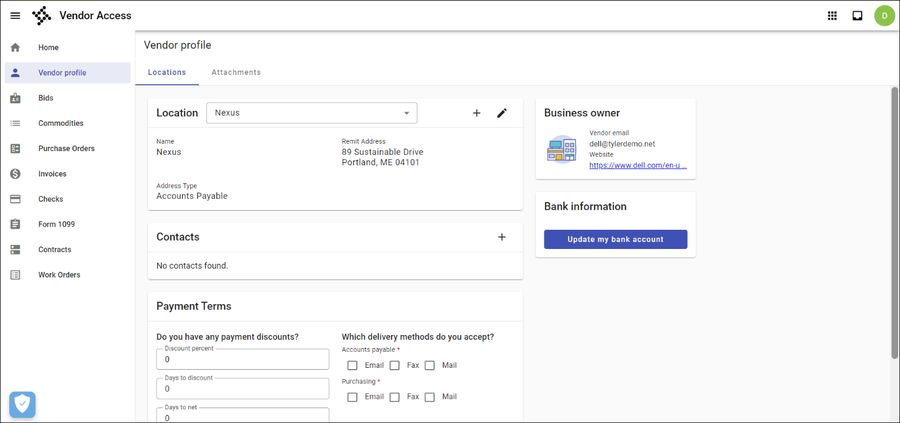
The Vendor Profile provides essential information about the vendor, including associated locations, contacts, payment terms, and attachments.
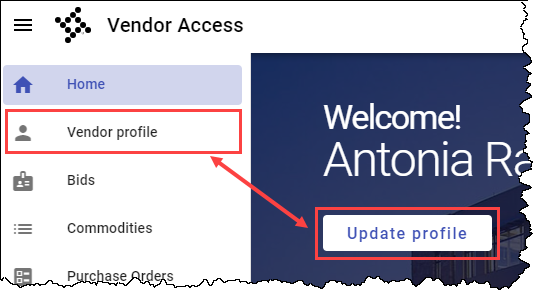
Access the Vendor Profile by selecting Vendor Profile in the navigation menu, or by clicking the Update Profile option on the home page.
↑ Back to top
Maintaining Profile Information
Locations
The Locations tab provides information for a selected location associated with the vendor, including the remit address, contact names and phone numbers, and accepted delivery and payment methods.
The Add and Edit options in each group allow vendors to maintain their information.
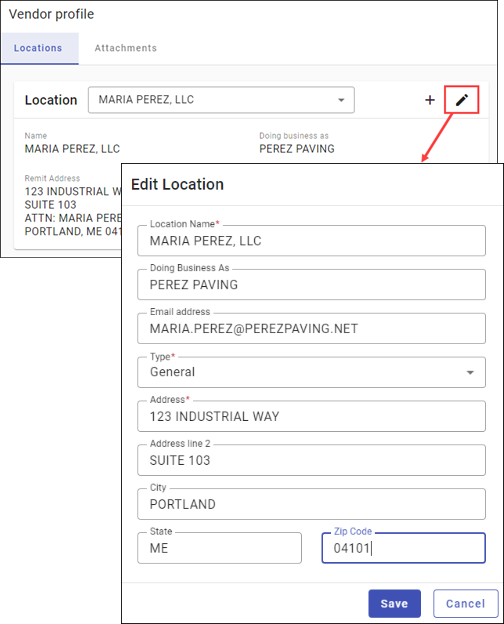
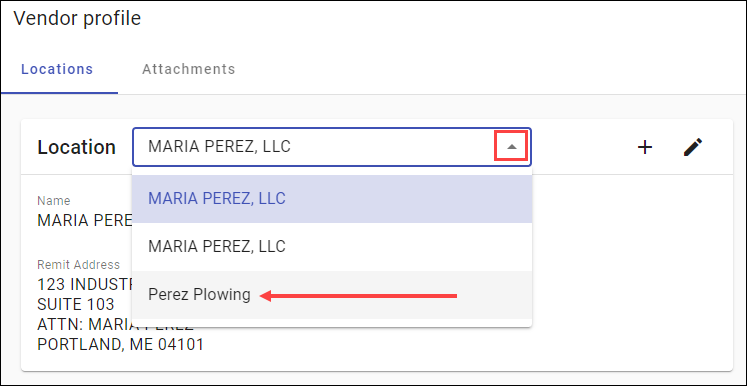
- To view a different location, click the Location list and select the desired location.
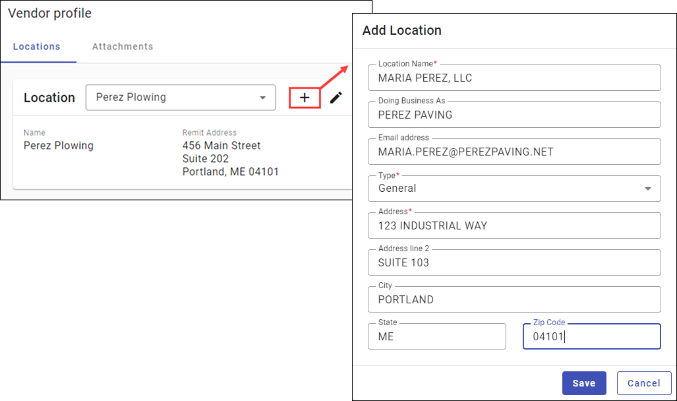
- To add a new location, click Add, complete the fields, and click Save.
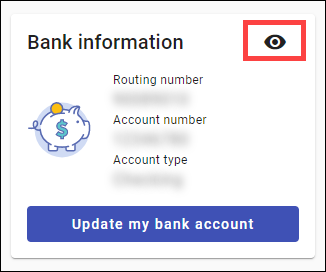
- Click Update My Bank Account to add or change bank account information.
- The View option shows or hides bank account information for privacy and security.
Contacts
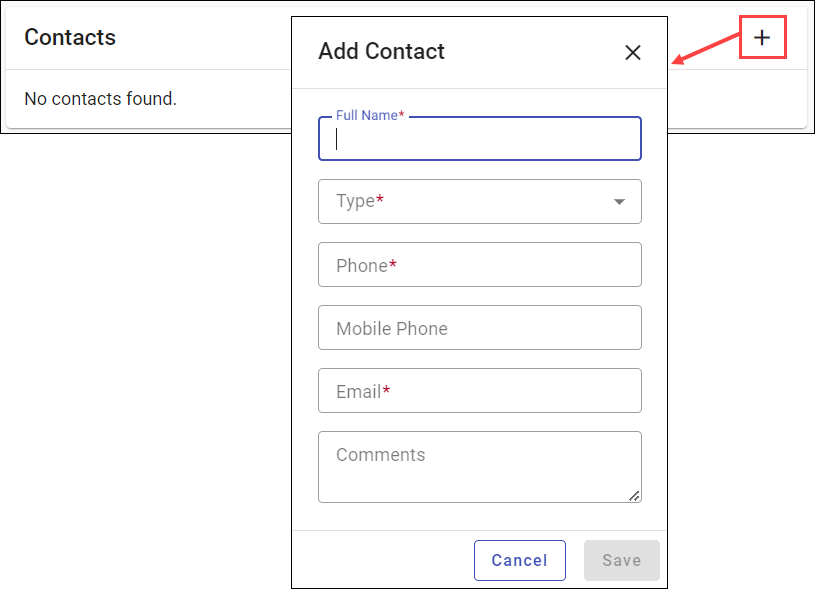
The Contacts group lists contacts associated with the selected location. If no contacts exist, use the Add option to enter a new contact.
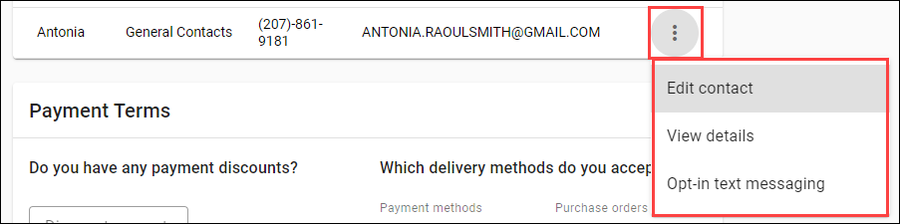
- Click the More button to see available actions for each contact record.
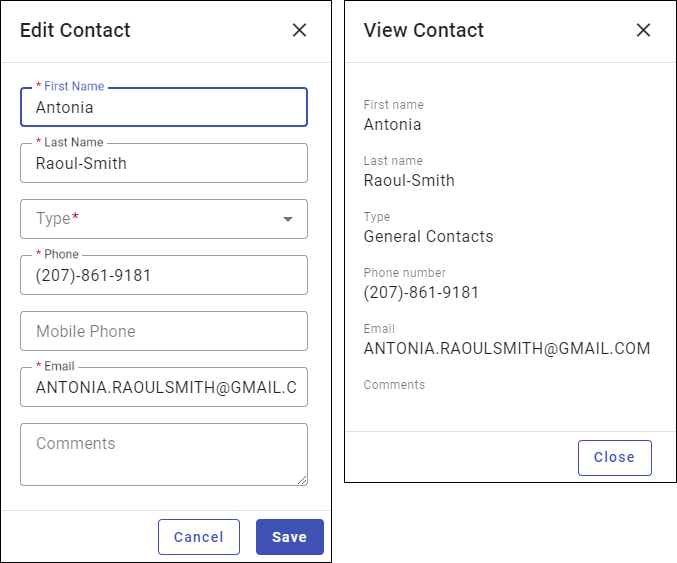
- Edit Contact provides access to update fields; View Details is informational only.
- The Opt-In Text Messaging option allows users to receive text messages.
Attachments
The Attachments tab displays attachment types established for vendors in the Tyler ERP solution. Attachments may be required or optional.
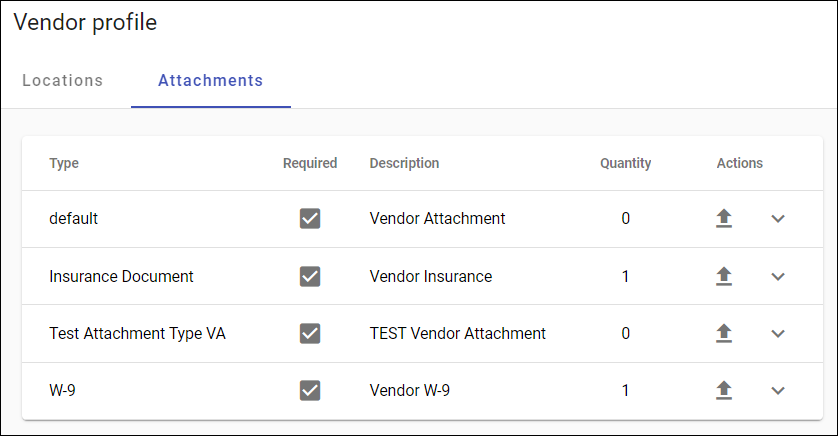
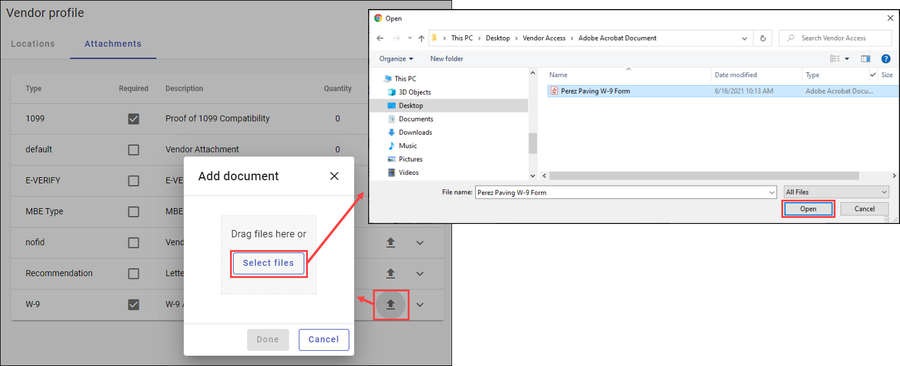
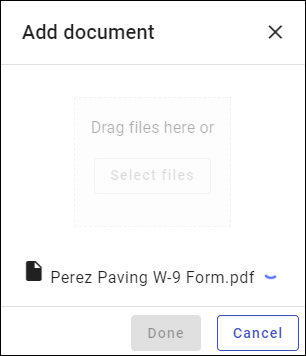
- Click Upload to open the Add Document dialog and select a file to attach.
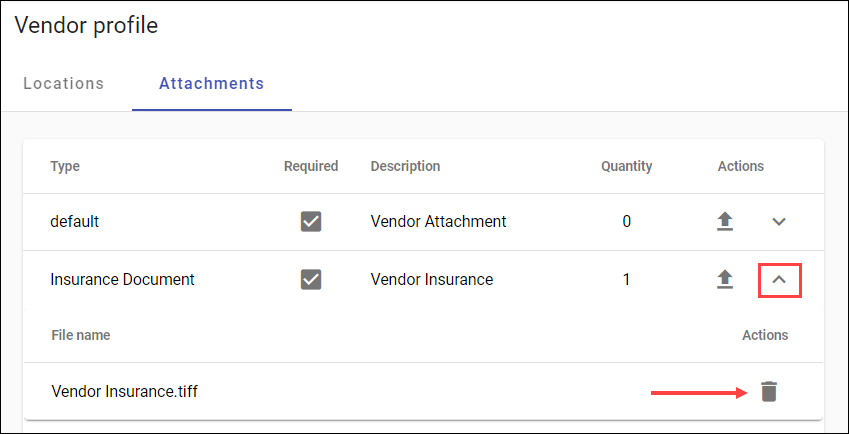
- To delete an attachment, click the arrow in the Actions column, then click Delete.
Pending Updates (Vendor Changesets)
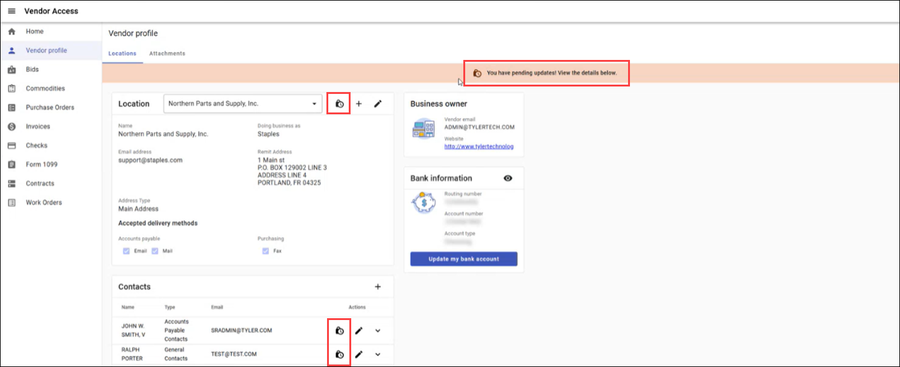
If Lake County has the VEU (Vendor External Update) workflow business rule configured in Enterprise ERP, any updates a vendor makes to their data in Vendor Access are submitted to the organization for review before taking effect.
When a changeset is pending, the page displays a warning message and Pending Updates buttons appear next to the affected fields.
- Click Pending Updates to view details about changes awaiting review and approval.
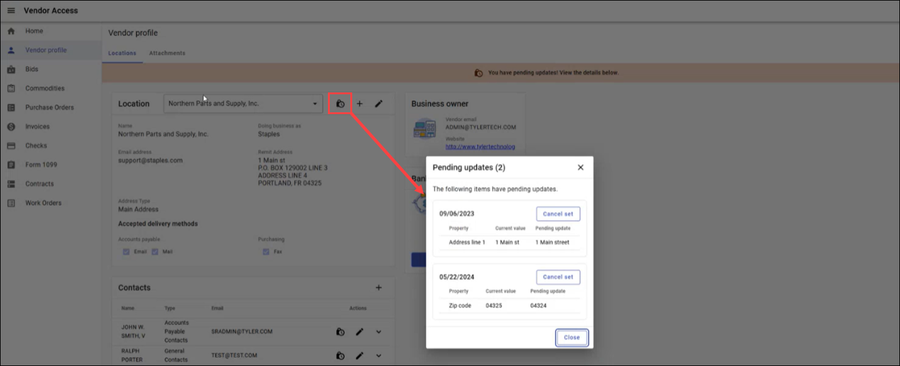
- Vendors may use the Cancel Set option to withdraw their submitted changes.
- Vendors cannot approve their own changes — approval is performed by Lake County staff in the ERP solution.
↑ Back to top
Purchase Orders
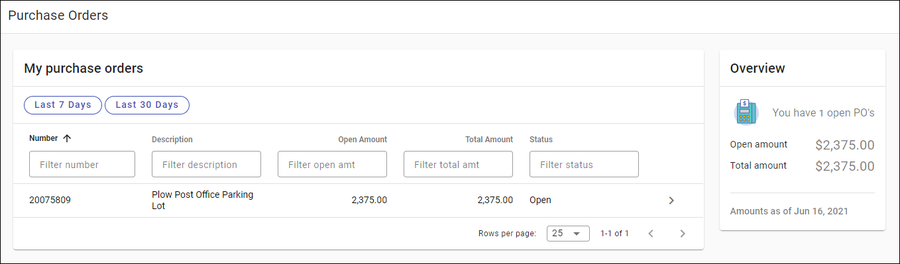
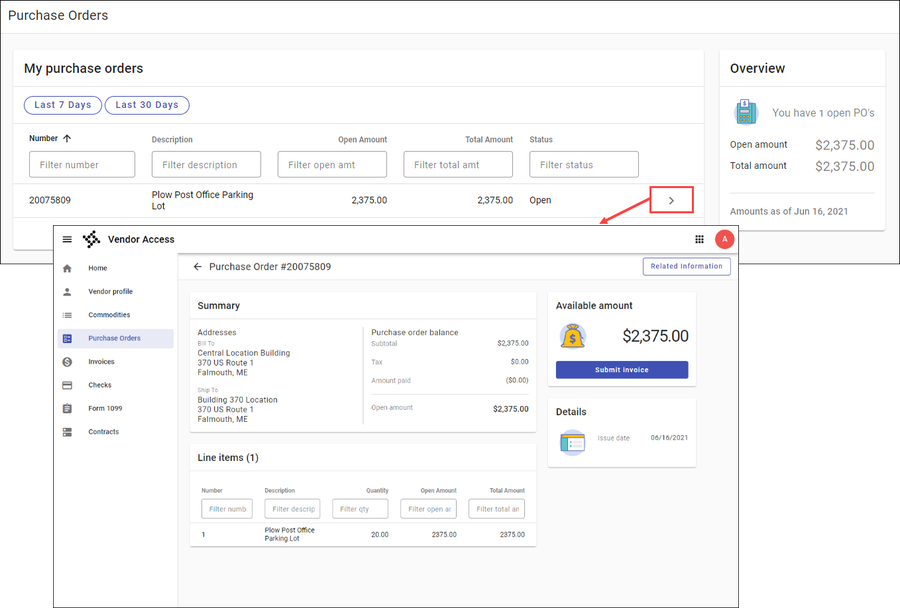
The Purchase Orders section provides a list of purchase orders issued to the vendor by Lake County.
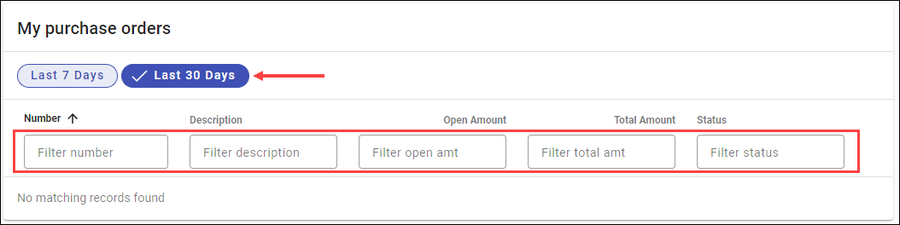
- The Last 7 Days and Last 30 Days filters allow quick viewing of recently issued purchase orders.
- Additional filters can be applied by purchase order number, description, open amount, total amount, or status.
- Click the arrow for a purchase order to view additional details.
Submitting an Invoice Against a Purchase Order
Clicking Submit Invoice on a purchase order record opens a screen to enter the invoice number and line-item liquidation options. The Liquidate All option completely liquidates the purchase order.
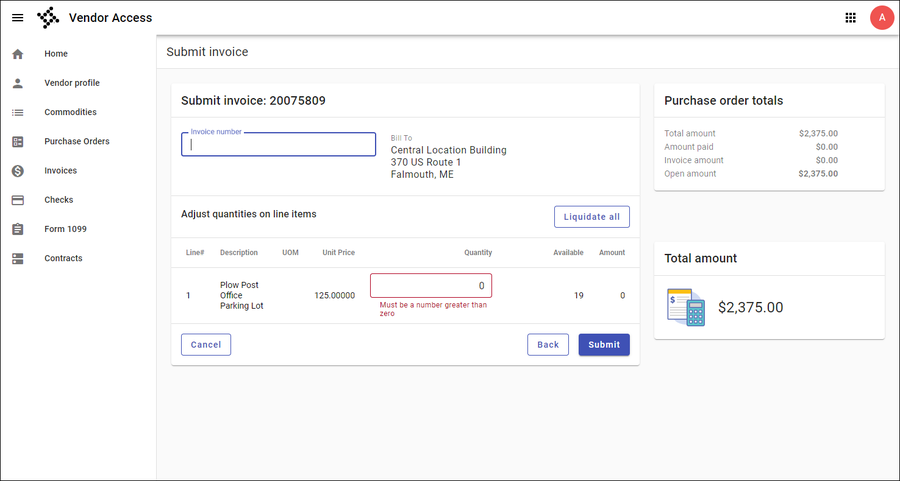
- Click Submit to submit the invoice to Lake County.
- Click Back to return to the purchase order details.
- Click Cancel to return to the home page.
↑ Back to top
Invoices
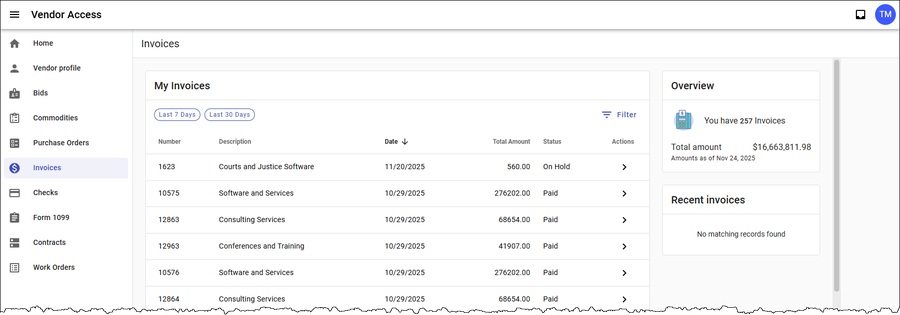
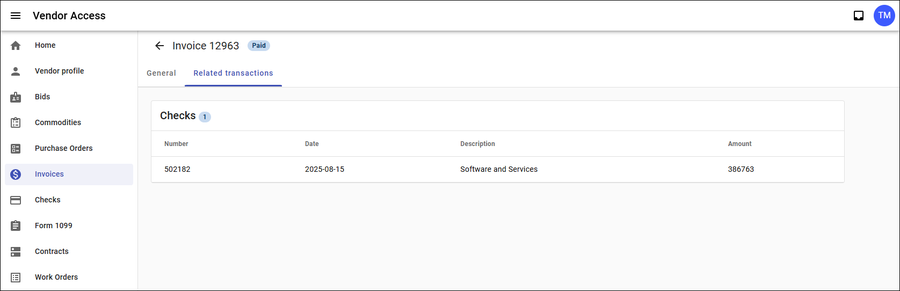
Clicking Invoices in the navigation menu displays the vendor’s submitted invoices.
- Click the arrow in the Actions column to view individual invoice details on the General tab.
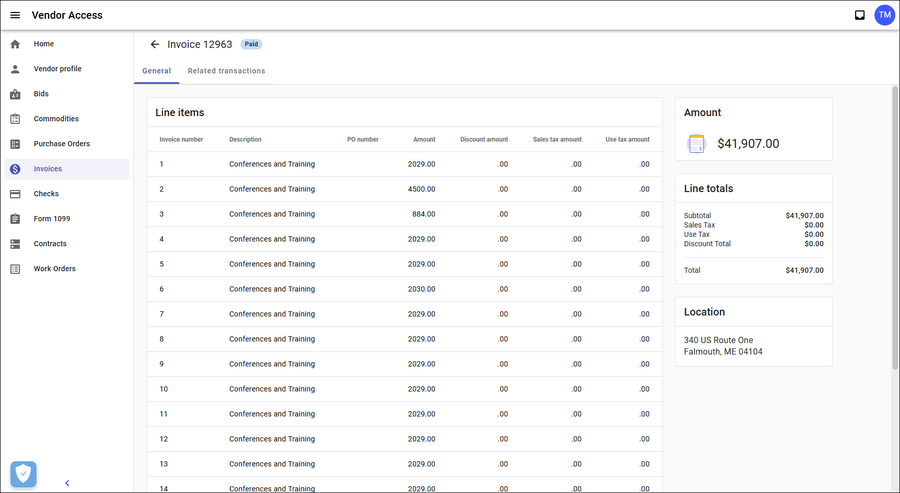
- The Related Transactions tab displays associated transactions, such as check information.
↑ Back to top
Checks
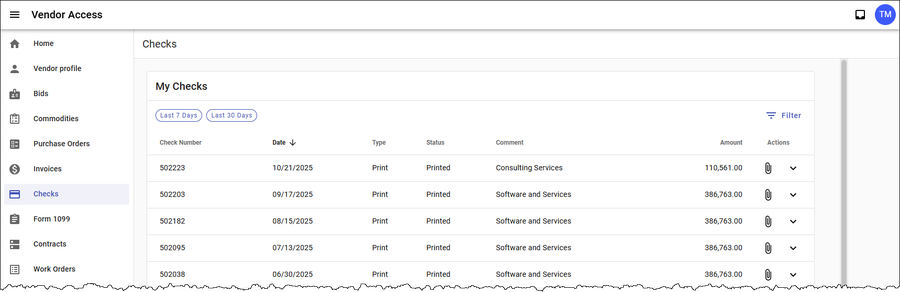
Clicking Checks displays a list of checks issued to the vendor by Lake County, including EFTs, manual checks, printed checks, voided checks, and stale checks.
- Filter checks by Last 7 Days or Last 30 Days.
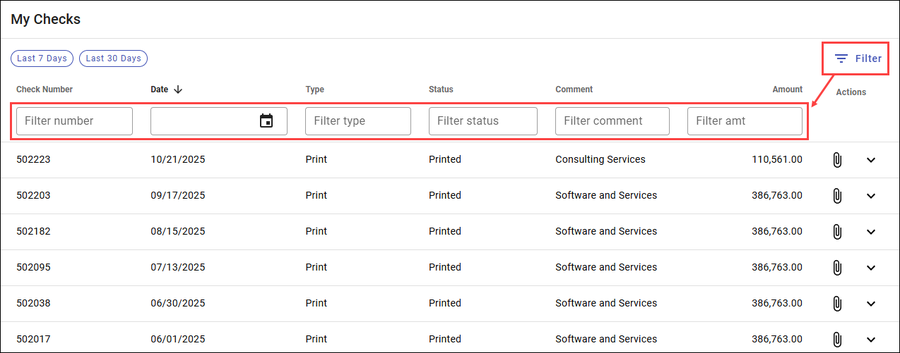
- Click the Filter option to apply specific criteria such as check number, date, or amount.
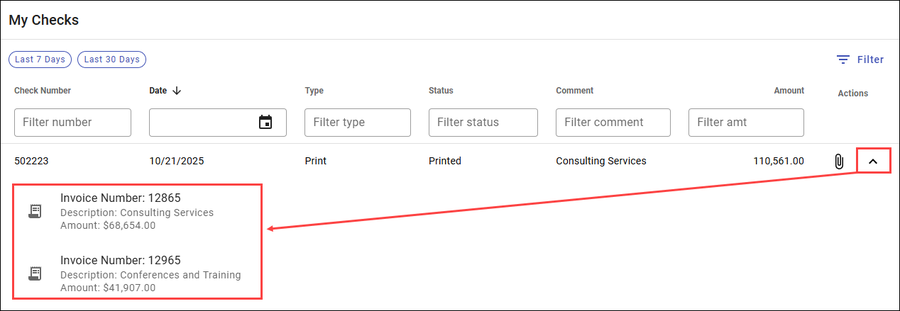
- Click the arrow for an individual check to view additional information, including associated invoices.
↑ Back to top
Form 1099
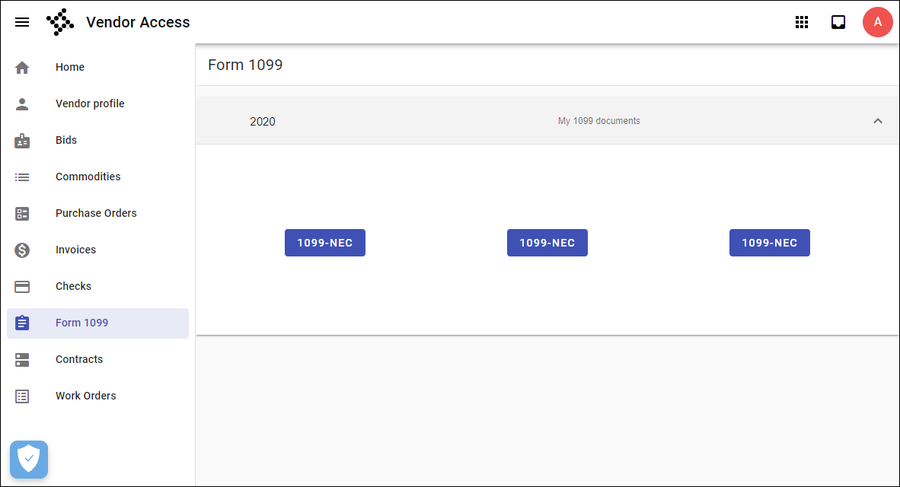
The Form 1099 section provides the vendor’s 1099 data organized by tax year.
- Each year with available 1099 data is listed.
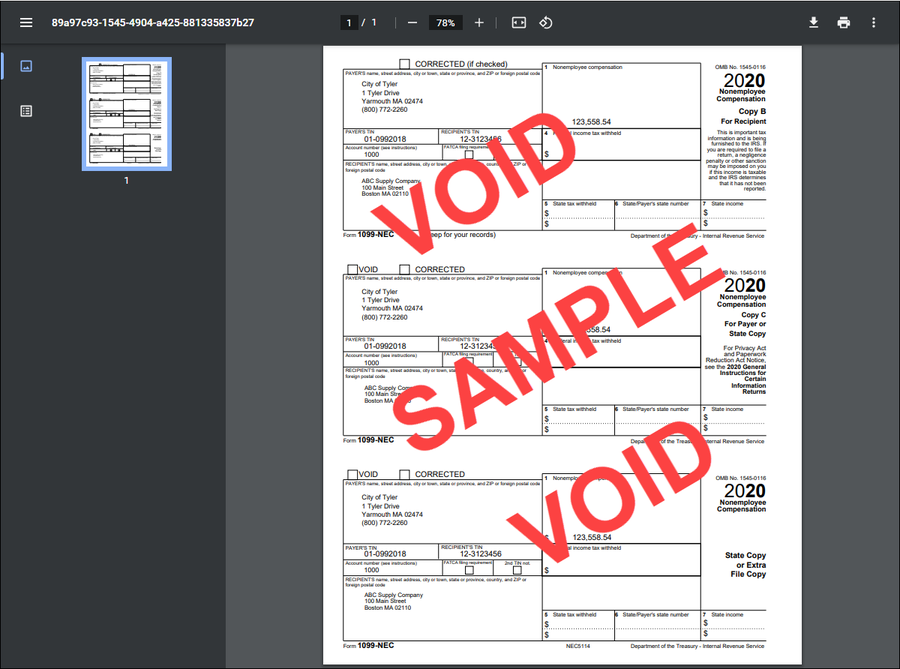
- Click the 1099 option for a given year to view the vendor’s 1099 form for that year.
↑ Back to top